


The Role of Window Measurements in Fit and Performance
Window measurements determine whether a treatment fits, meets manufacturer warranty requirements, and delivers its expected energy and daylight performance. Get them wrong by even a quarter inch, and you may face drafts, failed inspections, or a custom reorder that adds weeks to your project.
Three reference points anchor every measuring decision:
- International Residential Code (IRC) and manufacturer installation instructions: Many manufacturers specify roughly 1/2 inch clearance per side for rough openings, and those instructions are often incorporated by reference into the IRC, giving them both warranty and code weight.
- International Energy Conservation Code (IECC): Product selection must confirm the rough opening can accept a unit meeting IECC U-factor and SHGC requirements for your climate zone.
- Beautifulwindowselgin: Provides measurement verification, custom drapery fabrication, and installation guidance so your dimensions translate directly into a finished treatment.
Professional fabrication requires precision to the nearest 1/16 inch. Homeowner planning measurements can be 1/8 inch, but must be professionally verified before any custom order is placed.
Table of Contents
- Why do accurate window measurements matter so much?
- What measurements do you need to capture before ordering?
- How does each measurement affect your treatment choices?
- Step-by-step measuring workflows for common treatments
- Common measurement mistakes and U.S. code and warranty pitfalls
- How window size and measurement decisions affect energy use and daylight
- When should you hire a pro vs. measure yourself?
- Key Takeaways
- A fabricator’s perspective on measurement accuracy
- Beautifulwindowselgin: measurement, fabrication, and installation support
- Useful sources and client resources
Why do accurate window measurements matter so much?
Measurement errors do not stay contained. They propagate through ordering, fabrication, installation, and ultimately code compliance. An oversized unit binds in the frame; an undersized one leaves gaps that admit drafts and noise. Neither outcome is recoverable without a reorder.
The regulatory and warranty stakes are concrete. Manufacturer installation instructions incorporated into the IRC mean that deviating from specified rough-opening tolerances can void a product warranty and trigger a failed inspection. For egress windows under IRC Section R310, the net clear opening must meet minimum thresholds, and the rough opening must be calculated backward from those requirements.
Warning: A measurement error of as little as 1/4 inch can cause drafts or require a full reorder for custom impact-resistant windows, which typically take 4–6 weeks to manufacture. That delay compounds when a permit is already open.
Research confirms that window-to-wall ratio choices affect occupant task performance and stress levels, meaning measurement decisions reach beyond structural fit into occupant wellbeing.
Pro Tip: Use field measurements for initial planning, but always have a professional verify dimensions before placing a custom fabrication order, especially for non-rectangular openings or egress work.
Key consequences of poor measuring:
- Treatments that bind, gap, or fail to achieve blackout performance
- Voided manufacturer warranties from incorrect rough-opening clearances
- Failed code inspections on egress or structural openings
- Reorders adding weeks and unplanned cost to a project
What measurements do you need to capture before ordering?
Every order-ready measurement set covers these dimensions, each taken at a specific reference point:
- Rough opening (RO): The framed opening behind casing, measured from stud to stud. Controls unit size and clearance allowances.
- Unit size: The manufactured window dimensions, typically 1/2 inch smaller per side than the RO (meaning the rough opening is 1/2 inch larger on each side than the unit, as required by most manufacturers and the IRC).
- Daylight opening (DLO): The visible glass area inside the frame. Controls shade and blind cut sizes.
- Jamb-to-jamb width: Measure at top, middle, and bottom from the interior face of each jamb, not from trim. Use the smallest of the three readings as your working width.
- Sill-to-head height: Measure at left, center, and right. Again, use the smallest reading.
- Frame/jamb depth: Measure from the interior face to the exterior face. Standard insert replacements require at least 3-1/4 inches (83 mm) of frame depth to seat the unit properly; frames shallower than this need consultation before ordering.
- Diagonal measurements: Measure corner to corner in both directions. A measurable difference in diagonal measurements signals an out-of-square opening that affects manufacturing and shimming. If the diagonals differ by more than 1/4 inch, make a note for the fabricator or installer.
- Head-to-floor: Needed for drapery rod placement and panel length.
- Wall thickness and sill angle: Relevant for shutters and deep-sill treatments.
Pro Tip: Label every measurement with a window ID (e.g., “LR-1 left wall”) and note orientation. Two windows in the same room often have different exact dimensions and must be measured individually.

How does each measurement affect your treatment choices?
Raw dimensions translate directly into fabrication decisions. The relationship between measurement and treatment type is specific, not general.
Inside mount vs. outside mount hinges on depth and exact jamb dimensions. An inside-mount shade or blind requires sufficient depth to clear the hardware and operate freely. Outside-mount treatments are controlled by how far above the head you place the rod or bracket and how wide you extend past the jamb to achieve the desired overlap and light block.
- Curtains and drapery: Rod placement above the head, desired stackback, and fullness multipliers all derive from window width and head-to-floor height. A standard fullness ratio of 2 to 2.5 times the rod width is common for drapery panels; that multiplier applied to a mismeasured width produces panels that look thin or crowd the glass. For detailed drapery-specific conventions, Beautifulwindowselgin’s guide on curtain measurement techniques covers the full process.
- Blinds and shades: Tight width tolerances and frame depth govern both operation and blackout performance. A shade cut too wide binds; cut too narrow, it leaves light gaps at the edges.
- Shutters: Frame depth, sightline, and molding allowances affect the manufactured panel dimensions. Measure the full depth and note any casing projection that reduces the usable mounting surface.
Pro Tip: When communicating measurements to a fabricator, sketch each window with labeled dimensions and include a photo. Note the window ID, mount type, and any out-of-square readings. That single annotated sheet prevents most ordering errors.
Step-by-step measuring workflows for common treatments
Tools required: Steel tape measure, folding rule with slide extension or laser measure, level, pencil, and a dedicated note sheet per window. A folding rule or laser measure improves accuracy in difficult corners and confirms squareness more reliably than a single tape reading.
Inside-mount roller shade or cellular shade
- Confirm frame depth meets the shade hardware’s minimum requirement.
- Measure width jamb-to-jamb at top, middle, and bottom. Record all three; use the smallest.
- Measure height sill-to-head at left, center, and right. Use the smallest.
- Check squareness: measure both diagonals. If they differ by more than 1/4 inch, note it.
- Deduct the manufacturer’s specified clearance from width before ordering (typically 1/4 to 3/8 inch total for inside mounts, but confirm the final deduction based on manufacturer instructions—most specify roughly 1/4 inch per side for clearance).
Outside-mount drapery rod
- Decide rod placement: typically 4–6 inches above the head jamb to visually raise the ceiling line.
- Measure from rod bracket to floor for panel length, adding 1/2–1 inch for a slight break or 1–2 inches for a puddle.
- Determine rod width: extend 3–6 inches past each jamb to allow stackback and maximize glass exposure.
- Calculate fabric width using your fullness multiplier (2–2.5x the rod width for standard drapery).
Roman shade
- Measure inside width and height as above, using the smallest readings.
- Add hem and valance allowances per your fabricator’s spec (for inside mounts, ensure final dimensions allow the manufacturer’s recommended clearance—commonly 1/4 inch per side—for smooth operation).
- Account for fabric stack height when the shade is raised; confirm the stacked shade clears the DLO.
Shutters
- Measure width and height at three points each; use the smallest.
- Record frame depth and note any casing or molding that reduces mounting clearance.
- Measure sill angle if the sill is not level; angled sills require a custom bottom rail cut.
Bay, bow, and arched windows
Measure each panel or segment individually. For arched windows, record the width at the widest point and the height from sill to the highest point of the arch, then measure the rectangular portion below the arch separately. Sketch the shape with dimensions at multiple points. For a full DIY workflow, Beautifulwindowselgin’s treatment measuring guide covers complex shapes in detail.
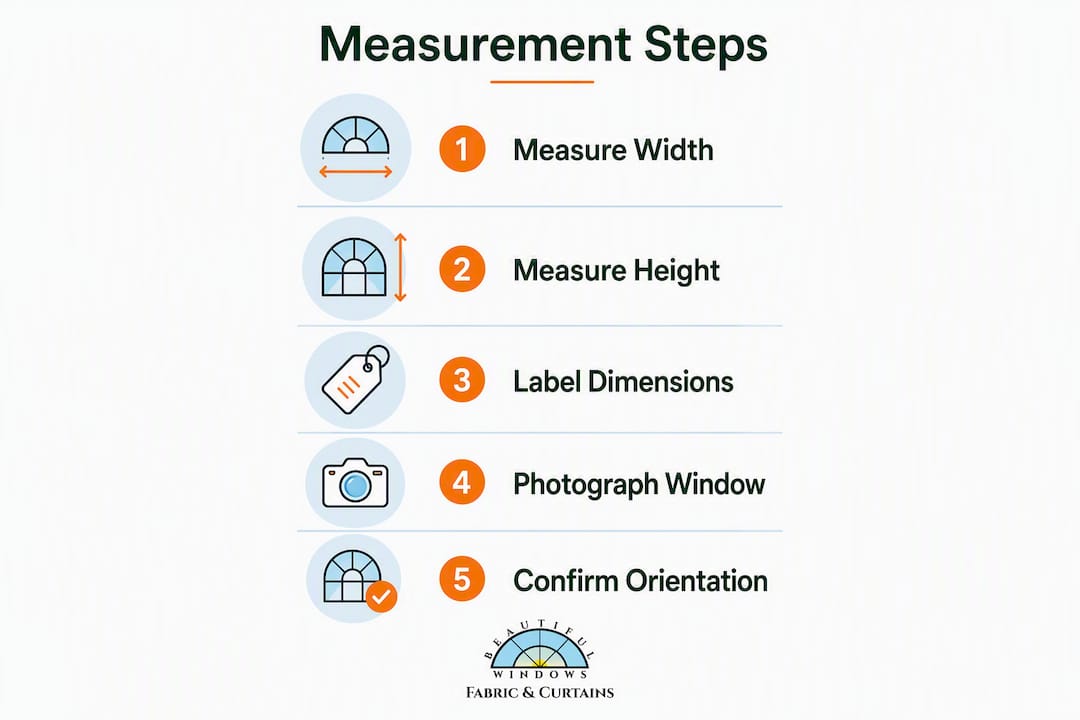
Pro Tip: Photograph each window after measuring, with a labeled card showing the window ID visible in the frame. For multi-window orders, this eliminates confusion between similar-looking openings.
Common measurement mistakes and U.S. code and warranty pitfalls
The most frequent errors share a pattern: they substitute a convenient shortcut for the correct reference point.
- Measuring from trim or casing instead of jamb faces
- Taking only one reading per dimension instead of three
- Assuming paired or adjacent windows are identical in size
- Skipping the depth check entirely
- Rounding to the nearest inch rather than 1/8 or 1/16 inch
Code and warranty risk: Manufacturer installation instructions incorporated into the IRC make specified rough-opening clearances a regulatory matter, not just a recommendation. Providing the wrong RO can void the product warranty and create problems at inspection. For egress openings, the net clear opening requirements under IRC Section R310 must be met, and the RO must be sized to accommodate a compliant unit. The IECC adds a parallel requirement: the RO must accept a unit meeting the U-factor and SHGC thresholds for your climate zone.
Pro Tip: Pull the manufacturer’s installation instructions before ordering, not after. Confirm the specified RO clearances and depth requirements, and keep that document with your project file in case of a warranty claim or inspection.
Insert replacements are measured from the existing frame interior; full-frame replacements are controlled by the rough opening behind casing. Conflating these two reference points is one of the most common ordering errors in the field.
How window size and measurement decisions affect energy use and daylight
Window sizing is a multi-objective trade-off. Larger glazing areas increase daylight availability and can improve occupant wellbeing and task performance, but they also increase heat exchange and cooling loads. Research on window-to-wall ratio and energy performance consistently finds that a WWR at or below 40% tends to minimize energy consumption in office settings, while workers’ task performance peaks at higher ratios, creating a genuine design tension.
Sizing note: Studies suggest intermediate window configurations often strike the best balance between thermal comfort and energy efficiency, with configurations around 2.2–2.5 m square cited as a reference range in research contexts.
Measurement decisions feed directly into this trade-off. A treatment specified without accurate glazing dimensions cannot be sized to control solar gain or insulation effectively.
- Solar-control fabrics and thermal linings must be sized to cover the full DLO plus an overlap allowance to prevent edge light gaps.
- Thermal curtain panels sized from inaccurate head-to-floor measurements leave gaps at the sill or ceiling that undermine insulation performance.
- Coordinating fabric selection with measured glazing size is one of the most practical ways to optimize both energy performance and comfort.
Pro Tip: For south- and west-facing windows with high solar exposure, specify a solar-control or thermal-lined fabric and size it to extend at least 2 inches beyond the DLO on all sides. That overlap is where most of the insulation benefit is gained or lost.
When should you hire a pro vs. measure yourself?
Straightforward rectangular openings in good condition are well within reach for a careful DIYer. Several situations call for professional measurement instead.
Hire a professional when:
- The opening is non-rectangular, out of square by more than 1/4 inch, or structurally modified
- Egress compliance is required (IRC Section R310 minimums apply)
- The window involves impact-resistant or laminated glazing where a reorder costs weeks and significant expense
- The project requires permits, which typically require documented measurements as part of the application
- The frame shows visible damage, rot, or prior modification that may affect usable dimensions
A single window takes an experienced measurer roughly 10–30 minutes. A whole-house visit typically runs 1–4 hours. For custom impact units, a measurement error can add 4–6 weeks to the project timeline, making professional verification a straightforward cost-benefit decision.
Questions to ask a professional measurer:
- Do you verify rough opening dimensions against unit size and manufacturer tolerances?
- Will you confirm the frame depth before ordering?
- Do you handle permit documentation if the opening size change is structural?
- Will you provide a written measurement report I can submit to the fabricator?
Beautifulwindowselgin’s measurement verification service supports both consumers and trade professionals through the consultation and fabrication process, reducing the risk of ordering errors on custom work.
Key Takeaways
Accurate window dimensions control fit, code compliance, fabrication quality, and energy performance across every treatment type.
| Point | Details |
|---|---|
| Three-point measurement rule | Measure width and height at three points each; always use the smallest reading as your working dimension. |
| Depth is non-negotiable | Standard insert replacements require at least 3-1/4 inches (83 mm) of frame depth; skipping this check causes installation failures. |
| Code and warranty are linked | Manufacturer RO clearances incorporated into the IRC carry both warranty and inspection consequences when ignored. |
| Energy performance starts at measurement | Treatment fabric and lining must be sized to the measured DLO plus overlap to deliver their rated insulation or solar-control benefit. |
| Beautifulwindowselgin supports the full process | Measurement verification, custom fabrication, and installation guidance are available to protect fit and warranty on every order. |
A fabricator’s perspective on measurement accuracy
From a fabricator’s standpoint, the quality of the measurements received determines the quality of the finished treatment, full stop. What matters most is not the tool used but the discipline applied: three readings per dimension, the smallest recorded, every window labeled individually, and depth noted without exception.
The place where slight measurement errors show up most visibly is at the seams and hems. A panel cut from a width that is off by 3/8 inch will hang with an uneven break at the floor or pull the leading edge away from the return. Hardware alignment problems, where a bracket sits 1/4 inch too high or too low, almost always trace back to a head-to-floor measurement taken from the wrong reference point.
Accurate measurements also protect installation schedules. A reorder on a custom fabric panel or a lined drapery set delays the entire room, not just the window in question. Providing complete, labeled measurement notes and photos at the time of consultation is the single most effective way to keep a project on track.
Beautifulwindowselgin: measurement, fabrication, and installation support
Precise measurements are where a well-finished treatment begins, and Beautifulwindowselgin treats that step as part of the service. For consumers and trade professionals ordering custom drapery, shades, or lined panels, the process includes photo-based or in-home measurement verification, custom fabrication to your confirmed dimensions, thermal lining options sized to your measured glazing area, and installation guidance, all with nationwide shipping.

The goal is straightforward: your measurements should arrive at the workroom complete, labeled, and ready to cut, with no ambiguity about mount type, depth, or allowances. Browse the designer drapery fabric collection to select your fabric once your dimensions are confirmed, or visit the measurement service page to book a verification consultation and get your custom order started on solid footing.
Useful sources and client resources
- Measuring for Window Replacement: Rough Opening and Sizing Standards — IRC incorporation, RO clearances, egress requirements, and IECC climate-zone thresholds
- How to Measure Replacement Windows (Milgard) — Three-point measurement protocol and the smallest-reading rule
- How to Measure Windows for Replacement (Lowe’s) — Frame depth requirements for insert replacements
- How to Measure a Window Opening (This Old House) — Tool selection and squareness verification techniques
- Window-to-wall ratio and occupant performance (ScienceDirect) — Research on WWR, energy consumption, and task performance
- Beautifulwindowselgin measurement service page — Measurement verification, custom fabrication, and installation support
- Beautifulwindowselgin DIY measuring guide — Step-by-step curtain and drapery measurement guidance
Reminder: Always consult the manufacturer’s installation instructions for the specific product you are ordering. Those instructions define the RO clearances, depth requirements, and tolerances that govern both warranty coverage and code compliance in your jurisdiction.
Recommended
- How to Measure Windows for Treatments: A DIY Guide – Fabric Store in Columbia, SC | Drapery Making Services
- How to Measure Windows for Custom Drapery and Treatments – Fabric Store in Columbia, SC | Drapery Making Services
- How to measure windows for curtains accurately – Fabric Store in Columbia, SC | Drapery Making Services
- Install Window Treatments in 1 Hour: Pro DIY Guide – Shop Designer Fabrics by the Yard | Curtains & Drapery