


How to Install Custom Drapery Hardware: Step-by-Step
Table of Contents
- Gather the Tools for Installing Curtain Rods
- Measure Window Width and Plan Your Custom Drapery Hardware Layout
- Set Curtain Rod Mounting Height and Extension
- Mark Bracket Locations and Check for Level
- How to Mount a Curtain Rod into Drywall or Studs
- Curtain Rod Brackets Spacing for Heavy Panels and Long Spans
- Hang Panels, Add Finials, and Troubleshoot Common Issues
- Conclusion: Finish Your Custom Drapery Hardware Installation
- Frequently Asked Questions
Last Updated: October 12, 2026
Gather the Tools for Installing Curtain Rods
Installing custom drapery hardware starts with the right kit.
Here is what to gather before you touch the wall:
- Tape measure (a stiff metal one, not a soft sewing tape)
- Pencil for marking bracket spots
- Spirit level, at least 24 inches long
Check your reach first. If you cannot comfortably hold a drill at the rod's mounting height, do not install custom drapery hardware alone.
Measure Window Width and Plan Your Custom Drapery Hardware Layout
Custom drapery hardware lives or dies on measurement. Custom tracks, traverse rods, and decorative poles are built to your exact window, so every dimension becomes a fabrication instruction.
Write down three numbers before you shop:
- Window trim width, edge to edge
- Desired rod length, trim width plus your extension on both sides
- Panel stack-back width, measured from the curtain's gathered edge
This is where custom treatments beat ready-made sets: you order a rod that fits your window exactly instead of settling for the nearest stock size. If you are sourcing fabric for the panels, our curtain panel collection is built for this kind of measured, made-to-fit project.
Inside Mount vs. Outside Mount
Custom hardware is ordered for one of two mounting styles, and the choice changes every number you record.
- Inside mount: The hardware sits inside the window frame or recess. Measure the width between the jambs at the top, middle, and bottom, then use the narrowest number. Inside mounts show more glass and trim but limit stack-back because panels must clear the frame depth.
- Outside mount: The hardware sits on the wall or ceiling above and beyond the trim. Measure the trim's outer width plus your desired extension on each side. Outside mounts are standard for custom drapery because they allow full stack-back, better light control, and taller visual lines.
Most custom drapery projects use outside mount. Inside mount suits café curtains, Roman shades, and bay windows with limited wall space above the trim.
Return Depth, Overlap, and Finished Length
Three measurements separate a custom order from a guess:
- Return depth: The distance from the front of the rod or track back to the wall, which determines how far fabric wraps around the hardware's end. Measure from the wall to the rod's centerline, then add the bracket's projection. A typical return is 3 to 6 inches, but deep crown molding or a protruding sill may need more. Too shallow a return leaks light around the panel edges.
- Overlap: For two-panel treatments meeting in the center, overlap is how far the panels cross when closed. A common overlap is 2 to 4 inches for pinch pleat and ripplefold panels. Without it, a gap shows at the center. Traverse rods and tracks often have an adjustable overlap setting at the master carrier.
- Finished length: Measure from the top of the rod or track down to your target drop. For floor-length panels, subtract 1/4 to 1/2 inch so fabric does not drag. For sill-length panels, end 1/2 inch above the sill. For a break or puddle, add the desired extra length. Always measure after the hardware is mounted, since bracket projection and rod diameter affect where fabric hangs.
Specialty Configurations: Bay Windows, Angles, and Ceiling Mounts
Standard measuring assumes a flat wall. Custom hardware often does not.
- Bay windows: Measure each segment individually, then measure the angle between segments. Most bay windows use 135-degree angles, but older homes vary. Order corner brackets or flexible track sections rated for that angle. Do not bend a rigid rod to fit; it will kink and crack the finish.
- Ceiling mount: Measure from the ceiling down to your target rod height, and measure the ceiling width where brackets attach. Ceiling hardware uses different brackets than wall mounts, and support spacing may differ because the load pulls straight down rather than out from the wall.
- Angled or sloped ceilings: Use a swivel or adjustable bracket that lets the rod sit level even when the mounting surface is not. Note the angle when ordering.
Note the mounting surface, any angle, and the bracket type you need. Missing these notes is the top reason a custom order arrives unusable.
Transfer Measurements to Your Order
Before you order, lay out a simple diagram:
- Sketch the window and label each segment.
- Mark the mounting surface and bracket locations.
- Note rod length, return depth, overlap, and finished length.
- Note the rod diameter or track profile, because brackets are sized to match.
- Note the finial or end treatment, since some finials add length beyond the rod.
A fabricator can work from this diagram without a site visit. If you are ordering fabric by the yard, use the finished length plus hem allowance to calculate yardage, and add fullness (typically 2 to 2.5 times the rod width for pinch pleat). Our embroidered fabric for custom curtains is a good starting point for panels with a little texture and detail.
Set Curtain Rod Mounting Height and Extension
Curtain rod mounting height is the decision most people rush, and it shows. Mount too low and the room feels short; too high and the panels float away from the window.
A reliable rule: place the rod above the trim, high enough that the panel top sits near the ceiling line or well above the trim. Higher mounting makes windows and ceilings look taller, as long as there is enough wall above the trim for the bracket to sit flat.
- Rod length = window trim width + extension on both sides
- Mounting height = trim top + your chosen clearance above the trim
- Panel length = from the rod down to your target drop
Mark Bracket Locations and Check for Level
Bracket placement is where a level earns its keep. Mark your first bracket at one end, then carry that height across to the other end before marking anything else.
- Mark the first bracket's height with a pencil.
- Hold the level at that mark and check the bubble.
- Mark the matching height at the far end.
- Mark any center support brackets along the same line.
- Step back and sight the marks before drilling.
A level line matters more than perfect symmetry. If your trim is slightly out of square, a level rod looks correct while a rod that follows the trim looks crooked.
How to Mount a Curtain Rod into Drywall or Studs
Learning how to mount a curtain rod into drywall comes down to one question: is there a stud where you need a bracket? Studs hold far more weight than drywall alone.
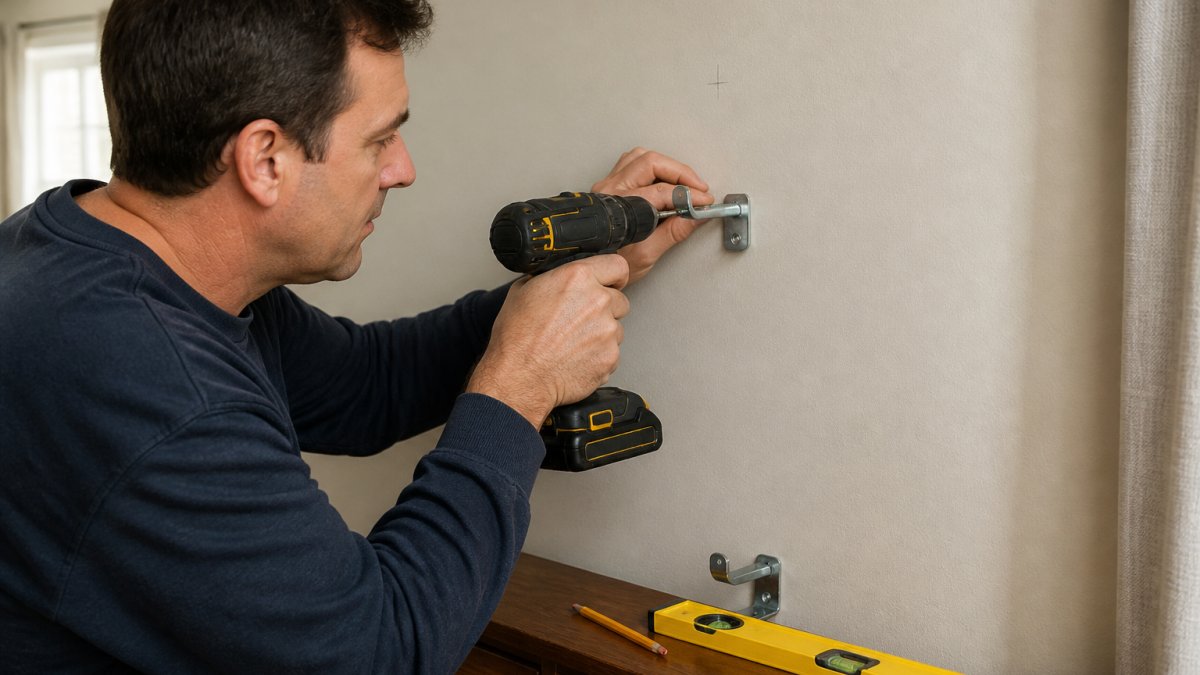
Here is the sequence:
- Run the stud finder across your bracket line and mark each stud with a pencil.
- If a bracket lands on a stud, drill a pilot hole and drive the screw straight in.
- If a bracket lands between studs, drill a pilot hole and set a drywall anchor rated for the load.
- Hold the bracket against the wall and check it with the level before the final tighten.
- Secure each bracket fully, then tug gently to confirm it is solid.
Pilot holes stop the screw from splitting the wall and keep the bracket from wandering. For drywall anchors, follow the maker's hole-size instructions, since oversized holes weaken the hold.
Matching Anchors to Hardware and Load
Custom drapery hardware is heavier than a basic rod, and the anchor must match both the load and the wall:
- Plastic expansion anchors: Light loads only, such as a short decorative rod with unlined panels. Not suitable for traverse rods, tracks, or heavy panels.
- Self-drilling metal anchors: Medium loads in drywall. They hold better than plastic but still rely on the drywall's strength.
- Toggle bolts: Heavy loads in drywall with no stud. The toggle spreads the load across a larger area behind the wall. Use these for ceiling mounts, long traverse rods, and lined or blackout panels.
For ceiling mounts, the load pulls straight down, so anchors must resist pull-out rather than shear. Toggle bolts or anchors rated for ceiling use are the minimum. If a joist is where you need a bracket, use it.
Wall-Mounted vs. Ceiling-Mounted Brackets
Wall brackets and ceiling brackets are not interchangeable. Wall brackets project out from the wall; ceiling brackets drop down from the ceiling. Some custom systems combine the two, such as a ceiling-mounted track with a wall-mounted return bracket at each end.
When mounting ceiling brackets:
- Mark the bracket line on the ceiling using the same level method as a wall mount.
- Confirm joist locations with a stud finder. Ceiling joists typically run perpendicular to the wall the window is on.
- Drill pilot holes and use toggle bolts or lag bolts into joists.
- Attach the brackets, then slide the rod or track into place.
- Check the track for level side to side and front to back.
Ceiling mounts are common for ripplefold tracks, room-darkening systems, and windows with little wall space above the trim.
Installing Traverse Rods and Tracks
Traverse rods and tracks are the hardware behind corded, wand-controlled, and motorized drapery. They mount differently from a decorative pole:
- Traverse rod: A metal or wood rod with an internal carrier system. Mount the brackets first, then snap or slide the rod into them. The master carrier (the one that pulls both panels) usually goes at the center or one end, depending on the model. Follow the maker's diagram for carrier placement.
- Ceiling track: A channel, usually aluminum or heavy PVC, that mounts to the ceiling with brackets spaced every 12 to 24 inches for light panels and closer for heavy panels. Install the end stops before hanging panels so carriers do not roll off the end.
- Cord and wand controls: After the track is mounted, thread the cord through the pulleys or attach the wand to the master carrier. Test the traverse before hanging panels. If carriers bind, the track is not straight or the brackets are not aligned.
For any corded system, keep the cord out of reach of children and pets. Cord tensioners or wand controls are safer for homes with young children.
Support Spacing for Heavy and Long Spans
Custom hardware often spans wider than a stock rod, and support spacing must match the load:
- Light panels, spans under 6 feet: Two end brackets are usually enough.
- Medium panels, spans 6 to 10 feet: Add a center support at the midpoint for wall mounts, or space ceiling-track brackets every 18 to 24 inches.
- Heavy or lined panels, spans over 10 feet: Space brackets every 12 to 18 inches, and favor studs or joists over drywall anchors. For very heavy treatments, such as blackout or interlined panels, use a track rated for the weight and follow the maker's spacing chart.
If your rod came with a center support, use it. Leaving it in the box is the fastest route to a bowed rod and dragging panels.
Curtain Rod Brackets Spacing for Heavy Panels and Long Spans
Curtain rod brackets spacing is the part most guides skip, and it is exactly where heavy drapery fails. A long rod with only two end brackets will sag in the middle under lined or heavy panels.
Plan support spacing around two things: rod length and panel weight.
- Short spans with light panels: two end brackets usually carry the load.
- Long spans: add a center support bracket to stop the sag.
- Heavy or lined panels: add supports more often, and favor studs over drywall anchors.
For a custom drapery hardware setup, this is where buying hardware sized to your actual window pays off. Stock rods come in fixed lengths and fixed support points.
Hang Panels, Add Finials, and Troubleshoot Common Issues
Hanging is the easy part once the hardware is right. Slide the curtain rings or rod pocket onto the rod before mounting it, then lift the rod into the brackets and lock it down.
When something looks off, match the symptom to the fix:
| Problem | Likely Cause | Fix |
|---|---|---|
| Rod sags in the middle | Not enough support brackets | Add a center support or extra bracket |
| Panels drag on the floor | Rod mounted too low or panels too long | Raise the rod or shorten the panels |
| Panels cover the glass when open | Not enough rod extension | Extend the rod past the trim |
| Bracket pulls loose | Screw missed the stud or anchor too small | Re-set with a larger anchor or into a stud |
| Rod looks crooked | Brackets not on a level line | Re-level and re-mark the brackets |
If you are finishing the look with fabric panels rather than pre-made, ordering by the yard gives you control over length, fullness, and pattern placement. Our embroidered fabric for custom curtains is a good starting point for panels with texture and detail.
Conclusion: Finish Your Custom Drapery Hardware Installation
The hard part is not the drilling. It is the measuring and planning that happen before the drill comes out. Get the width, height, and support spacing right, and the rest of the install goes quickly.
If you would rather skip the guesswork on fabric and fabrication, Beautiful Windows Elgin can help. We offer designer fabrics sold by the yard with nationwide shipping, custom drapery services on request, and a curated selection built for real projects rather than warehouse volume.
Frequently Asked Questions
What tools do I need to install custom drapery hardware?
You will need a tape measure, pencil, level, drill with bits sized to your screws, screwdriver, wall anchors for drywall, and a hammer for tapping anchors into place. A stud finder helps locate solid mounting points. Keep the hardware kit's screws and brackets together so nothing gets lost. For heavier custom drapery hardware, add a step ladder and possibly a helper to hold long rods while you mark bracket positions.
How high should I mount drapery hardware above a window?
A common approach is to mount the rod 4 to 6 inches above the window trim, or closer to the ceiling for a taller look. Higher mounting makes windows appear larger and gives curtain panels room to stack without covering glass. If you have crown molding, leave enough clearance below it. Mark your curtain rod mounting height on both sides of the window and check with a level before drilling.
How do I install drapery hardware into drywall?
For drywall, drill pilot holes at your marked bracket locations, then tap in drywall anchors with a hammer. Line the mounting bracket up with the anchors, drive screws through the bracket, and tighten until snug without crushing the drywall. If a stud sits behind any bracket, screw directly into it for maximum hold. For how to mount a curtain rod into drywall on long spans, add a center support bracket to prevent sagging.
How far apart should curtain rod brackets be?
Place brackets roughly 2 to 4 inches from each end of the rod, then add center supports every 30 to 36 inches for longer rods. Curtain rod brackets spacing matters most with heavy drapery, where too few supports cause the rod to bow. For wide windows or ceiling-mounted setups, plan support spacing before drilling so brackets land on studs where possible. A level check across all brackets keeps the rod straight.