Installation

How To Hang Curtains & Draperies
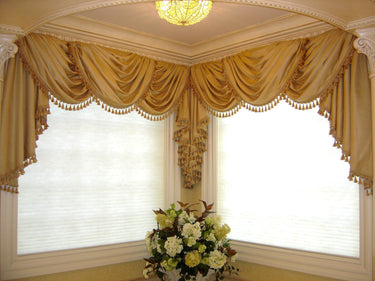
Draperies add an elegant touch to your home and helps with light and temperature control. Drapery panels are one of the most beautiful touches you can add to your overall décor, creating the illusion of a larger window opening. Installing curtains and draperies are an easy DIY project that can be completed in minutes. This guide will show you how to hang curtains such as grommet, pinch-pleat, inverted-pleat, contemporary-pleat, and rod pocket.

Tip: Before taking a window treatment measurement, you need to determine if it will be an inside or outside mount installation.   

  • To hang curtains, you will essentially follow the same process at the beginning, with deviations occurring later. Below are the steps you must complete to hang all the curtains in this guide:
  • Determine where your draperies will hang by aligning a steel measuring tape vertically in the center of your window. Lower the tape measure down to a point where you would like the bottom of your drapery fabric to rest. 
  • Then, extend your measuring tape above the center of your window to the full length of your panel and mark lightly with a pencil where you want your curtains to hang. 
  • If you want your curtains set higher, simply measure 4 to 6 inches above the window's frame. Hanging your curtains higher makes your window appear taller. 
  • From this mark, measure out to each side a distance equal to half of your rod length. Subtract 6 inches for brackets and finials and place a small mark at the top of your measuring tape. 
  • If you are installing with wood hardware, begin by loosening the screws on the back of each wood bracket and remove the attached bracket holders. Align the bottom of the center opening of the bracket holder over the top of your pencil mark, and then make two guide marks through the top and bottom openings with a pencil.
  • If you are using metal hardware, align the top of your bracket opening over your pencil mark and make two guide marks with your pencil. Plastic wall anchors are included for attaching your mounting hardware. Drill a hole on each mark to insert your anchor screws. Then, press or tap your anchor screws into the wall.
  • Metal brackets come in two sections. An L-shaped section is used to mount the bracket to the wall and a second section is used to hold the drapery rod.
  • If you're using metal brackets, secure the short end of the metal L-shaped extension bracket to the wall with two screws. Place the metal bubble located on the bottom of the rod holder section into the groove on top of the L-shaped extension bracket. Slide the rod holder section backward or forward along the groove to position the rod at the desired distance to the wall. Tighten the sections together with the adjustment screw.
  • If you are using wood brackets, attach the bracket holders to both sides of your window with the included hardware. To mount your brackets to the wall, reattach them to the mounting hardware by sliding the screws in the brackets down to the slots. 
  • Tip: Although full installation can be accomplished with a simple screwdriver and pencil, we recommend pre-drilling with an electric drill or using a cordless screwdriver. Be sure to read your product’s included instructions for specific details pertaining to your custom window treatments.

    Hanging Grommet Curtains

  • After following the steps above, place your finial at the end of the rod. Secure your finial to the rod by turning the adjustment screw clockwise. 
  • Slide your drapery panels onto the rod and finish by securing the second finial.
  • Lift your completed drapery rod and carefully set it on your brackets. Secure the rod to your brackets by tightening the adjustment screws. Repeat on the right. 
  • Finally, fan out the material on the pole to the inside edges of your bracket. 
  • And that's it. You have successfully hung grommet panel.

Hanging Inverted-Pleat Curtains

  • After following the steps above, begin assembling your balance by lightly turning the screw at the end of the first finial clockwise into the end of the wood pole. 
  • Slide your drapery panels onto the rod, and finish by tightening your second finial.
  • If you're using metal hardware, secure your finial to the rod by turning your adjustment screw clockwise. Finish by securing the second metal finial.
  • Lift-up your completed drapery rod and carefully set it on your brackets. Fan out the material on the pole to the inside edges of your bracket.
  • Complete the installation by adjusting the folds to a pleasing arrangement. 

Hanging Curtains

  • After following the steps above, begin assembling your balance by lightly turning the screw at the end of the first finial clockwise into the end of the wood pole. 
  • Turn your pole over and slide the number of rings onto the pole equal to the total amount of hooks on your curtain. Finish by attaching your second finial to secure your rings.
  • If you are using metal hardware, secure your finial to the rod by turning your adjustment screw clockwise. For metal rings, don't forget to attach the included plastic hooks to them before sliding them onto the rod. Finish by securing the second metal finial to your rod.
  • Lift -up your completed drapery rod and carefully set it on your brackets. Position the last ring on the left between the finial and mounting bracket. Repeat on the right.
  • Insert the curtain's hook onto the hook of the ring between the finial and bracket. Keep going until all hooks of the curtain panel are attached. 
  • Complete the installation by adjusting the folds to a pleasing arrangement. These are also called tab top Curtains.

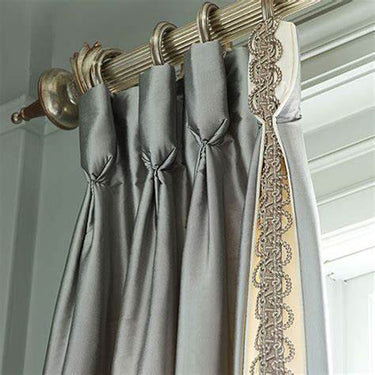
 Pinch-Pleat Curtains

  • After following the steps above, begin assembling your balance by lightly turning the screw at the end of the first finial clockwise into the end of the wood pole. 
  • Turn your pole over and slide the number of rings onto the pole equal to the total amount of hooks on your curtain. Finish by attaching your second finial to secure your rings.
  • If you are using metal hardware, secure your finial to the rod by turning your adjustment screw clockwise. For metal rings, don't forget to attach the included plastic hooks to them before sliding them onto the rod. Finish by securing the second metal finial to your rod.
  • Lift -up your completed drapery rod and carefully set it on your brackets. Position the last ring on the left between the finial and mounting bracket. Repeat on the right.
  • Insert the curtain's hook onto the hook of the ring between the finial and bracket. Keep going until all hooks of the curtain panel are attached. 
  • Complete the installation by adjusting the folds to a pleasing arrangement. You have successfully hung pinch pleat curtains.

Hanging Contemporary-Pleat Curtains

  • After following the steps above, begin assembling your balance by lightly turning the screw at the end of the first finial clockwise into the end of the wood pole. 
  • Turn your pole over and slide the number of rings onto the pole equal to the total amount of hooks on your curtain. Finish by attaching your second finial to secure your rings.
  • If you are using metal hardware, secure your finial to the rod by turning your adjustment screw clockwise. For metal rings, don't forget to attach the included plastic hooks to them before sliding them onto the rod. Finish by securing the second metal finial to your rod.
  • Lift-up your completed drapery rod and carefully set it on your brackets. Position the last ring on the left between the finial and mounting bracket. Repeat on the right.
  • Insert the curtain's hook onto the hook of the ring between the finial and bracket. Keep going until all hooks of the curtain panel are attached. 
  • Complete the installation by adjusting the folds to a pleasing arrangement. 

Hanging Rod Pocket Curtains

  • After following the steps above, begin assembling your balance by lightly turning the screw at the end of the first finial clockwise into the end of the wood pole. 
  • Slide your curtain panels through the rod and finish by tightening your second finial. 
  • If you are using metal hardware, secure your finial to the rod by turning your adjustment screw clockwise. Finish by securing the second metal finial to your rod.
  • Lift-up your completed drapery rod and carefully set it on your brackets. 
  • Fan out the material on the pole to the inside edges of your bracket.
  • Complete the installation by adjusting the folds to a pleasing arrangement. You have successfully hung rod pocket curtains.