


Step-by-step curtain installation: the complete DIY guide
TL;DR:
- Proper proportion and fullness are vital for a polished, luxurious curtain appearance.
- Accurate measurements and “high and wide” placement enhance room height and width.
- Using quality fabric and finishing touches elevates the overall refined look of DIY curtains.
Store-bought curtains rarely look polished straight out of the package. Most homeowners hang them at the wrong height, choose panels that are too narrow, or skip the level entirely, only to notice every crooked bracket the moment sunlight hits the wall. The good news is that professional-looking results are entirely achievable without hiring a specialist. This guide walks you through every stage of curtain installation, from assembling your tools to styling the finished panels, with specific techniques that elevate the result from functional to refined.
Table of Contents
- Gather the right tools and materials
- Measure and mark for perfect curtain placement
- Install brackets and rods securely
- Hang curtains and achieve a tailored look
- Troubleshooting and expert finishing touches
- Our take: why designer touches matter in DIY curtain installation
- Elevate your space with professional fabrics and expert advice
- Frequently asked questions
Key Takeaways
| Point | Details |
|---|---|
| Prepare with precision | Gather all tools and materials before starting to avoid mid-project trips to the store. |
| Embrace ‘high and wide’ | Placing rods above and beyond the window frame creates the illusion of larger, taller windows. |
| Fullness is key | Choose curtain panels at least twice the width of the window for a luxurious, custom look. |
| Double-check for level | Ensuring brackets are even prevents crooked rods and uneven curtain hems. |
| Finishing touches matter | Small adjustments—like steaming out wrinkles and hemming—elevate your DIY installation to a professional standard. |
Gather the right tools and materials
A smooth installation starts well before the first screw goes into the wall. Gathering everything in advance prevents the frustrating back-and-forth between rooms and helps you identify any missing supplies before you are mid-project.
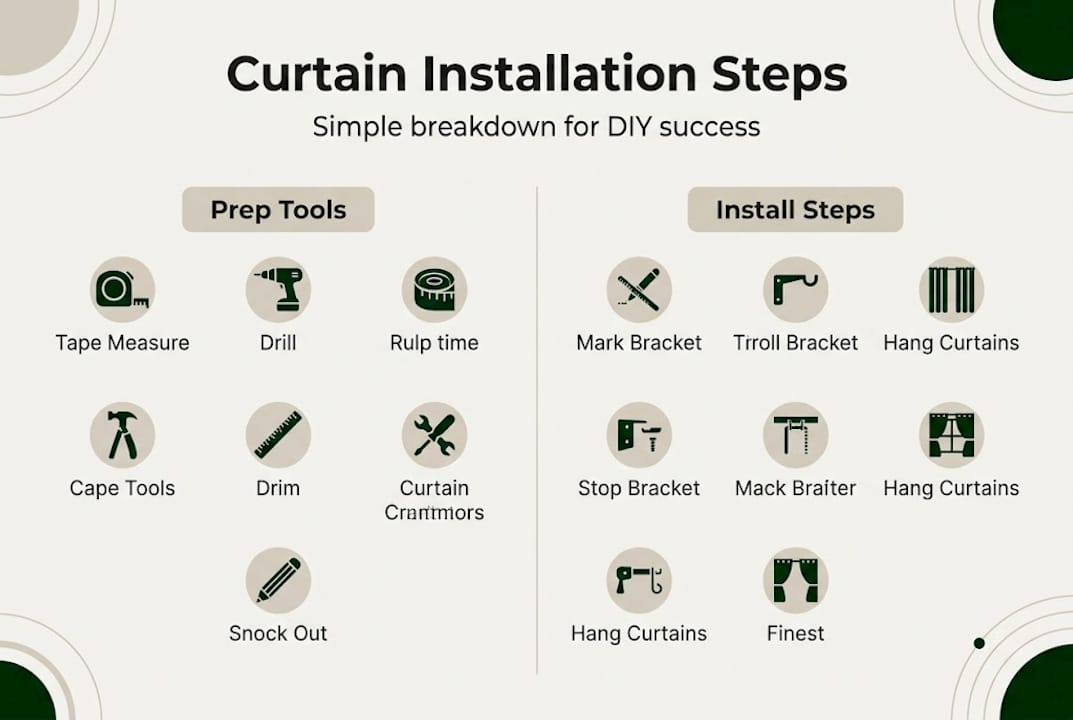
Essential tools checklist:
- Power drill or screwdriver
- Tape measure
- Pencil for marking
- Level (a standard 24-inch level works well)
- Step stool or ladder
- Screws and wall anchors (appropriate for your wall type)
- Curtain rod and brackets
- Curtain panels
- Curtain rings, hooks, or clips (depending on your rod and panel style)
The type of curtain rod you select significantly shapes the character of the room. Sleek, metallic rods read as modern and minimal. Ornate wood or resin rods communicate a more traditional or transitional aesthetic. Before purchasing, consider how the curtain style selection process connects to the existing furniture and finishes in the room. A mismatch between the rod style and the room’s overall tone undermines even perfectly installed panels.
Rod sizing reference table:
| Window width | Recommended rod length | Bracket quantity |
|---|---|---|
| Up to 36 inches | 48 inches | 2 brackets |
| 36 to 60 inches | 66 to 72 inches | 2 brackets |
| 60 to 84 inches | 90 to 120 inches | 3 brackets |
| 84 inches or wider | 120 to 144 inches | 3 to 4 brackets |
Pro Tip: Purchase a rod that extends 6 to 12 inches beyond the window frame on each side. This keeps the panels from blocking light when drawn open and makes the window appear wider. According to Good Housekeeping, prioritizing a “high and wide” placement elevates room proportions, and using 2 to 2.5 times the fabric width creates luxurious folds.
Fabric choice matters just as much as hardware. Heavier fabrics like jacquard satin or lined linen panels require sturdier rods and brackets. Lighter sheers work with thinner, more decorative rods. Review a detailed curtain materials guide to match the fabric weight to the right hardware before you buy.
Measure and mark for perfect curtain placement
Measuring is where most DIY curtain installations succeed or fail. A few minutes spent getting precise numbers prevents panels that graze the windowsill when they should pool gracefully on the floor, or rods mounted so low they make ceilings feel shorter.
How to measure your window, step by step:
- Measure the total width of the window from one outside edge of the trim to the other. Write this number down.
- Add 12 to 24 inches to this measurement (6 to 12 inches per side) to determine the total rod span needed.
- Measure the height from the floor to where you plan to mount the rod. Most designers recommend mounting the rod 4 to 6 inches above the window frame, though ceiling-mount rods produce an even more dramatic result.
- Subtract 0.5 inches from your floor measurement if you want panels to hang with a clean break. Add 2 to 4 inches if you prefer a slight pool of fabric.
- Mark the bracket locations lightly in pencil on the wall, then use your level to confirm both marks align exactly before drilling.
The “high and wide” approach is worth understanding in detail. Mounting a rod close to the ceiling draws the eye upward, which makes the room feel taller. Extending the rod well beyond the window frame makes the window itself appear broader. This technique works especially well in rooms with standard 8-foot ceilings, where visual height is always a welcome addition.
Placement comparison table:
| Mount location | Visual effect | Best for |
|---|---|---|
| At window frame | Emphasizes actual window size | Rooms with architectural windows |
| 4 to 6 inches above frame | Adds moderate height | Most residential rooms |
| Near ceiling or at ceiling | Dramatically elongates walls | Small rooms, low ceilings |
| Extended wide | Widens the window visually | Narrow windows, long walls |
A thorough curtain measurements tutorial can provide room-specific guidance if your windows are unusually proportioned. Bay windows, arched windows, and corner windows each require slightly different approaches to measuring and marking.
Pro Tip: After marking both bracket points, hold the rod up to the marks and visually confirm the alignment before drilling. Catching an error at this stage costs nothing. Catching it after drilling costs spackle and patience.
When choosing window curtains, factor the panel drop into your decision. Floor-length panels look intentional and elegant. Sill-length or apron-length panels work in kitchens or casual spaces where floor-length panels would collect dust or create a safety issue.
Install brackets and rods securely
With your marks on the wall and your hardware ready, the physical installation can begin. This stage moves quickly when you follow a methodical order and double-check alignment before committing each screw.
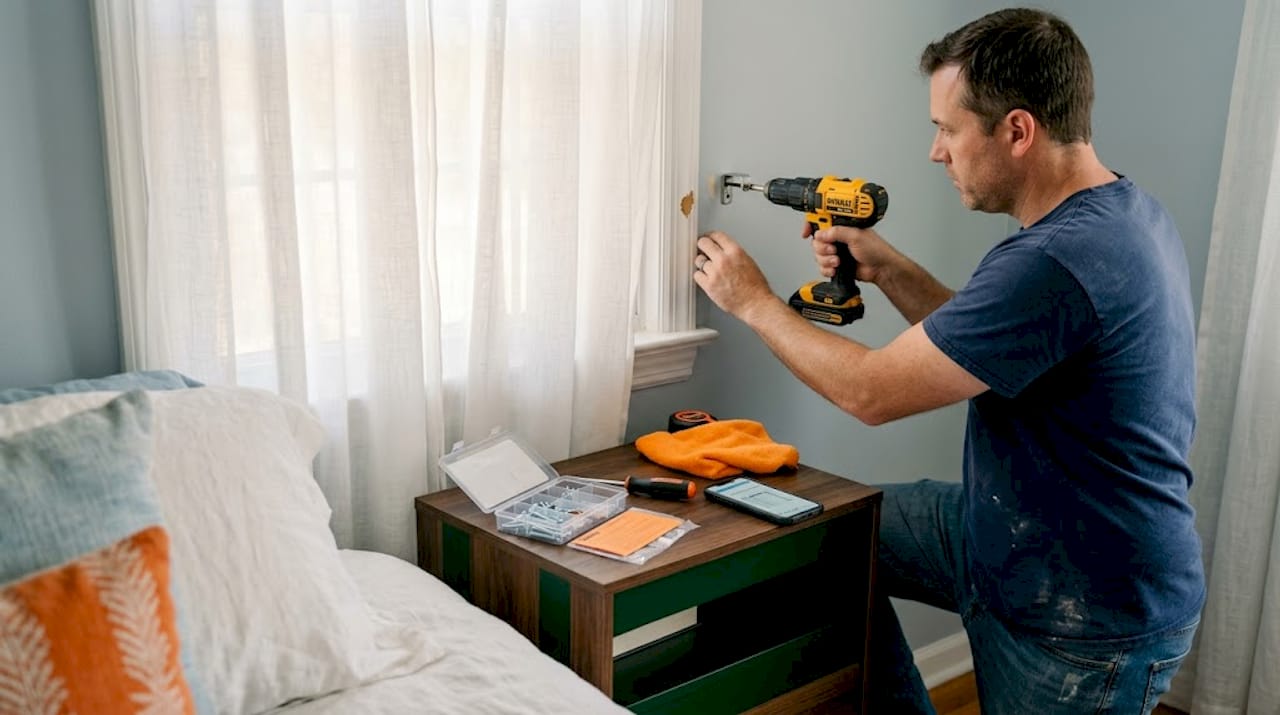
Step-by-step bracket installation:
- Hold one bracket against the wall at your first pencil mark. Use a pencil to trace the screw holes through the bracket onto the wall.
- Set the bracket aside. Use a drill bit slightly smaller than your screw diameter to pre-drill the holes. This prevents the wall material from splitting.
- If your pre-drilled hole lands between studs, insert wall anchors before driving the screw. Tap anchors gently into the hole until flush with the wall surface.
- Position the bracket over the anchors and drive the screws until the bracket sits firm against the wall. Do not overtighten, which can strip the anchor.
- Repeat the process for the second bracket on the opposite side of the rod.
- For rods wider than 60 inches, install a center support bracket using the same process. Center support brackets prevent the rod from bowing under the weight of heavy panels.
- Slide the rod into the brackets without the curtains attached. Gently press down in the center and feel for any flex or give. A stable rod should not move.
Safety note: Drywall alone cannot support the weight of heavy drapery panels without wall anchors. For curtains made from dense fabrics like jacquard satin or interlined panels, use toggle bolts rather than standard plastic anchors, which provide significantly more holding strength.
Pro Tip: After securing both brackets, set a level across the tops of both and check the reading before sliding in the rod. A bracket that reads level on its own but sits 0.25 inches higher than the opposing bracket will produce a visibly crooked installation. Confirm both brackets match precisely.
This curtain installation guide provides additional technical guidance for tricky wall types, including tile, plaster, and concrete, which require specialized drill bits and anchor types.
Hang curtains and achieve a tailored look
Hardware in place, the most satisfying stage begins. Hanging and styling the panels correctly is what separates a functional curtain installation from one that looks genuinely custom.
Step-by-step panel hanging process:
- If using curtain rings with clips, attach the clips evenly across the top of each panel before loading the rings onto the rod. Space clips approximately 4 to 6 inches apart for an even gather.
- If using rod-pocket panels, thread the rod through the pocket before placing the rod into the brackets.
- For pinch-pleat or eyelet panels, hook or thread them onto the rod as directed by the panel’s header style. Eyelet panels simply thread directly onto the rod, while pinch-pleat panels require drapery hooks inserted into the pleat folds.
- Once both panels are on the rod, place the rod into the brackets and secure the bracket covers or finials.
- Stand back and assess the general hang before touching the fabric. Look for obvious imbalances in length or distribution.
Achieving fullness and a designer appearance:
- Panels should total 2 to 2.5 times the width of the window for generous, luxurious folds when gathered
- Separate and fluff each panel by running your hands from the top down, pulling the fabric forward slightly to create soft folds
- For a trained look, fold the fabric into even columns at the base of each panel and hold it in place with soft ties for 24 to 48 hours
- Consider a curtain lining guide if your panels look limp, as lining adds body and makes fabric drape more cleanly
Common mistakes to avoid:
- Hanging panels that are too short (panels should at minimum reach the floor, with 0.5 to 1 inch of clearance or a deliberate pool)
- Using only one narrow panel per window instead of two fuller panels
- Skipping the steaming step, which leaves fabric looking rumpled and inexpensive
- Choosing panels without adequate weight or lining for the fabric type
Designer callout: The curtain selection tips and the fullness formula are non-negotiable for a polished look. Two skimpy panels on a wide window will always look like an afterthought, regardless of how precise the installation is.
Refer to a focused curtain fabric selection guide to confirm that your chosen material will hold its shape and drape correctly once installed.
Troubleshooting and expert finishing touches
Even careful installations occasionally produce results that need a small correction. Knowing how to address these issues quickly keeps the project moving and ensures the final result meets a high standard.
Common issues and how to fix them:
- Crooked rod: Remove the rod and use a level to identify which bracket is off. Loosen the misaligned bracket, adjust its position, and re-secure with new pilot holes if necessary. Fill old holes with spackle before repainting.
- Uneven panel lengths: Check if the issue is with the floor (which is often not perfectly level) or with the rod. For slightly uneven floors, hem the shorter-appearing panel rather than rehang the rod.
- Wrinkled or creased fabric: Steam panels while they hang for the best results. Pulling fabric gently downward during steaming helps set the vertical drape. Avoid pressing folds into place with a flat iron, which can damage decorative weaves.
- Light gaps at the sides: Move each bracket outward by 2 to 3 inches so the panels cover more wall on either side of the window when drawn closed. This also makes the window appear wider.
- Fabric that does not pool evenly: Spread the fabric at the floor and arrange it into soft, natural folds. A small amount of steam at the base encourages the fabric to settle.
For those working with natural fiber panels, the linen curtain sewing tips on our blog address specific challenges like shrinkage and irregular drape that can affect the final look.
Pro Tip: Seasonal fabric swaps are one of the easiest ways to refresh a room without redecorating. Lighter sheers in spring and summer, heavier lined panels in fall and winter, all using the same hardware, keep a room feeling current without any additional drilling.
For homeowners pursuing a blackout effect, overlap the two panels by 2 to 4 inches at the center when closed and use a high and wide rod placement to minimize side gaps. A double rod that holds both a sheer and a blackout panel gives maximum flexibility throughout the day.
Our take: why designer touches matter in DIY curtain installation
Most installation guides focus on the mechanics. Get the brackets level, use the right anchors, keep the panels straight. These fundamentals matter, but they only address half of what makes curtains look truly refined. The other half is proportion.
In our experience working with homeowners and professional workrooms alike, the most common mistake is underestimating the visual impact of panel fullness and rod height. A room with precisely level brackets and correctly anchored hardware can still look flat and uninspired if the panels are too narrow or the rod sits too low.
The “high and wide” principle and the 2 to 2.5 times fullness rule are not suggestions. They are the structural foundation of how curtains communicate luxury. When those two elements are applied correctly, even an affordable fabric looks intentional and well-considered. Skipping them, even with expensive fabric, produces a result that reads as incomplete.
We encourage every DIYer to take the extra step of confirming proportions before purchasing panels. Review your measurements against our achieve perfect window dressing resources, and prioritize fullness over cost savings when choosing panel quantities. The difference in the final result is significant and lasting.
Elevate your space with professional fabrics and expert advice
Precise installation technique deserves fabric that performs equally well. The right material holds its shape, drapes cleanly, and complements the room’s existing palette without overwhelming it.

At Beautiful Windows Elgin, you will find an extensive selection of designer fabrics including jacquard satin, cotton, and embroidered textiles, all suited for custom drapery projects. Whether you are sourcing fabric for your first DIY installation or equipping a professional workroom, our catalog offers quality and variety to match your vision. Browse our premium curtain fabrics and request samples before committing. Our design consultation services are available to help you select the right fabric weight, lining, and finish for your specific windows.
Frequently asked questions
What is the best height to hang curtain rods?
Mount curtain rods 4 to 6 inches above the window frame for a standard look, or position them close to the ceiling for a more dramatic, room-elongating effect, as recommended by Good Housekeeping.
How wide should curtain panels be?
Curtain panels should total 2 to 2.5 times the actual window width, a proportion that produces full, luxurious folds rather than a flat, sparse appearance when the curtains are closed.
Do I need wall anchors for curtain installation?
Wall anchors are strongly recommended when installing brackets into drywall between studs, but are not necessary when screws drive directly into a wall stud, which provides reliable support without additional hardware.
How can I keep curtains looking full at the bottom?
Selecting panels that meet the 2 to 2.5 times fullness ratio and arranging the base fabric into soft, even folds helps maintain a full, custom look that holds its shape over time.
Recommended
- Curtain Installation Guide: Achieve Perfect Window Dressing – Shop Designer Fabrics by the Yard | Curtains & Drapery
- Curtain Style Selection Process for Custom Drapery Success – Shop Designer Fabrics by the Yard | Curtains & Drapery
- Curtain Fabric Selection Guide 2026: Pick Styles That Last 30% Longer – Designer Fabrics by the Yard | Drapery Making Services
- Curtain materials guide: expert tips for stunning windows – Fabric Store in Columbia, SC | Drapery Making Services